
How to Hang Art: Easy Steps for Perfect Display
by Mae Osz on Oct 09, 2025
Have you ever wondered how to hang art so it actually transforms your space instead of just filling a wall?
The secret is in the placement, not just the piece.
Hanging your artwork at around 60 inches from the floor—average eye level—instantly makes it more impactful and easier to enjoy.
This small change can turn a forgotten corner into a stunning focal point, without buying a single extra frame. With the right height, balance, and flow, you’ll see your art (and your room) in an entirely new light.
Table of Contents
- Choosing The Right Place For Your Art
- Hoe to hanf art: Essential Tools And Hanging Methods
- Tips For Arranging Multiple Pieces
- Avoiding Common Mistakes When Hanging Art
Quick Summary
| Takeaway | Explanation |
|---|---|
| Select the right height for art | Hang art approximately 60 inches from the floor for optimal viewing comfort. |
| Protect artwork from environmental damage | Avoid hanging pieces near heat sources or direct sunlight to preserve their integrity. |
| Use appropriate tools for hanging | Gather essential tools like a measuring tape and stud finder to ensure precise and secure installation. |
| Maintain consistent spacing for arrangements | When displaying multiple art pieces, keep 2-3 inches of space between them for a cohesive look. |
| Plan your layout before hanging | Use painter’s tape or digital tools to visualise arrangements to avoid unnecessary wall damage. |
Choosing the Right Place to Hang Art
When transforming your living space with art, selecting the perfect location is more than just finding an empty wall. It’s about creating a visual narrative that enhances your room’s atmosphere and reflects your personal style. The art’s placement can dramatically influence how the piece is perceived and how it interacts with your existing décor.

Understanding Visual Balance and Room Dynamics
Before hammering a single nail, take a moment to assess your room’s architectural features and overall design. The Holburne Museum suggests that centering artwork between architectural elements like windows, fireplaces, or doorways creates a sense of visual harmony. Consider the wall’s proportions and how the artwork’s mass will complement the existing space.
Eye level plays a crucial role in art placement. According to Iowa State University Extension, the centre of an artwork should typically be positioned around 60 inches from the floor - which corresponds to average human eye level. This guideline ensures that viewers can comfortably appreciate the piece without straining their neck.
Preservation and Environmental Considerations
Art is not just about aesthetics but also preservation. The Museum Conservation Institute provides essential guidance on protecting your artwork. Avoid hanging pieces near direct heat sources like radiators or in areas with significant temperature fluctuations. Sunlight can be particularly damaging, causing colours to fade and materials to degrade.
When selecting a wall, prioritise areas with stable humidity and minimal direct sunlight. If a wall receives substantial natural light, consider using UV-protective glass or positioning the artwork slightly offset to minimise direct exposure. Remember that different materials - canvas, paper, photographs - have varying sensitivities to environmental conditions.
Practical Hanging Strategies
Before committing to a location, use painter’s tape to create a template of your artwork’s dimensions on the wall. This visual guide helps you understand how the piece will look and interact with surrounding elements. For gallery-style arrangements, maintain consistent spacing between pieces - typically 2-3 inches - to create a cohesive display.
Consider the wall’s structural integrity as well. Hanging artwork securely requires finding wall studs or using appropriate anchoring systems. Heavy pieces demand more robust mounting solutions, so invest in quality picture hooks, wall anchors, or professional installation services if needed.
Ultimately, choosing the right place for your art is an intuitive process that balances technical considerations with personal aesthetic preferences. Trust your instincts, experiment with placement, and create a space that tells your unique visual story.

How to hang art: Essential Tools and Methods to Hang art
Successfully hanging art requires more than just enthusiasm and a blank wall. Proper tools and techniques transform the process from potentially frustrating to remarkably precise. Whether you’re a seasoned decorator or a first-time art enthusiast, understanding the right equipment and methods can make all the difference in creating a professional-looking display.

Gathering Your Hang art Toolkit
Every art hanging project demands a specific set of tools. The Smithsonian Institution recommends assembling a comprehensive toolkit before beginning your project. Essential items include:
Below is a summary checklist of essential tools needed for successful and safe art installation, ensuring you are fully prepared before beginning your project.
| Tool | Purpose/Benefit |
|---|---|
| Measuring tape | Ensures accurate placement |
| Pencil | Marks precise hanging points |
| Spirit level | Keeps artwork level and straight |
| Stud finder | Locates secure wall supports |
| Hammer | Drives nails/picture hooks |
| Electric drill | For complex or heavy-duty installations |
| Assorted wall anchors | Matches different wall and frame types |
- Measuring tape: Ensures precise placement and alignment
- Pencil: For marking exact hanging points without permanent damage
- Spirit level: Guarantees straight, perfectly horizontal artwork
- Stud finder: Helps locate secure wall anchoring points
- Hammer: Traditional mounting tool
- Electric drill: For more complex hanging scenarios
- Assorted wall anchors: Suitable for different wall types and artwork weights
Quality matters when selecting these tools. Invest in reliable, sturdy equipment that provides accuracy and stability. A professional-grade spirit level, for instance, can prevent crooked displays and potential wall damage.
Understanding Hanging Hardware
The National Park Service Conservation Guidelines highlight the critical importance of selecting appropriate hanging hardware. Different artwork weights and wall materials require specific mounting solutions:
To help you select the most suitable hanging hardware for your art and wall type, here is a comparison of different hardware methods, their best uses, and key features.
| Hardware Type | Best For | Key Features |
|---|---|---|
| Wire Hanging | Lighter frames | Allows minor adjustments, easy to reposition |
| D-Ring Mounting | Heavier pieces | Greater stability, distributes weight evenly |
| Cleats & Rail Systems | Gallery-style displays | Easy repositioning, minimal wall holes, adjustable |
| Wall Anchors | Heavy/oversized artwork | Increases wall support and prevents damage |
| Picture Hooks | Most framed art | Simple installation, various weight ratings available |
Wire Hanging
- Best for lighter frames
- Requires sturdy picture wire attached securely to frame
- Allows minor adjustments after initial placement
D-Ring Mounting
- Provides more stability for heavier pieces
- Metal D-rings attached directly to frame sides
- Distributes weight more evenly
Cleats and Rail Systems
- Ideal for gallery-style displays
- Allows easy repositioning without multiple wall holes
- Excellent for frequently changing artwork arrangements
Advanced Hanging Techniques
Beyond basic tools, professional art hanging involves understanding weight distribution, wall composition, and aesthetic balance. For heavier artworks, consider these advanced techniques:
- Use multiple anchoring points to distribute weight
- Select wall anchors rated for your artwork’s specific weight
- Consider professional installation for valuable or exceptionally heavy pieces
- Test wall strength before hanging delicate or expensive art
Remember that different wall materials - plasterboard, brick, concrete - require unique approaches. A concrete wall might need specialized drill bits and anchors, while plasterboard demands careful stud location and appropriate wall plugs.
Precision is key in art hanging. Take your time, measure carefully, and don’t hesitate to seek professional advice for complex or valuable pieces. Your artwork deserves a secure, beautifully presented home that showcases its unique character and your personal style.
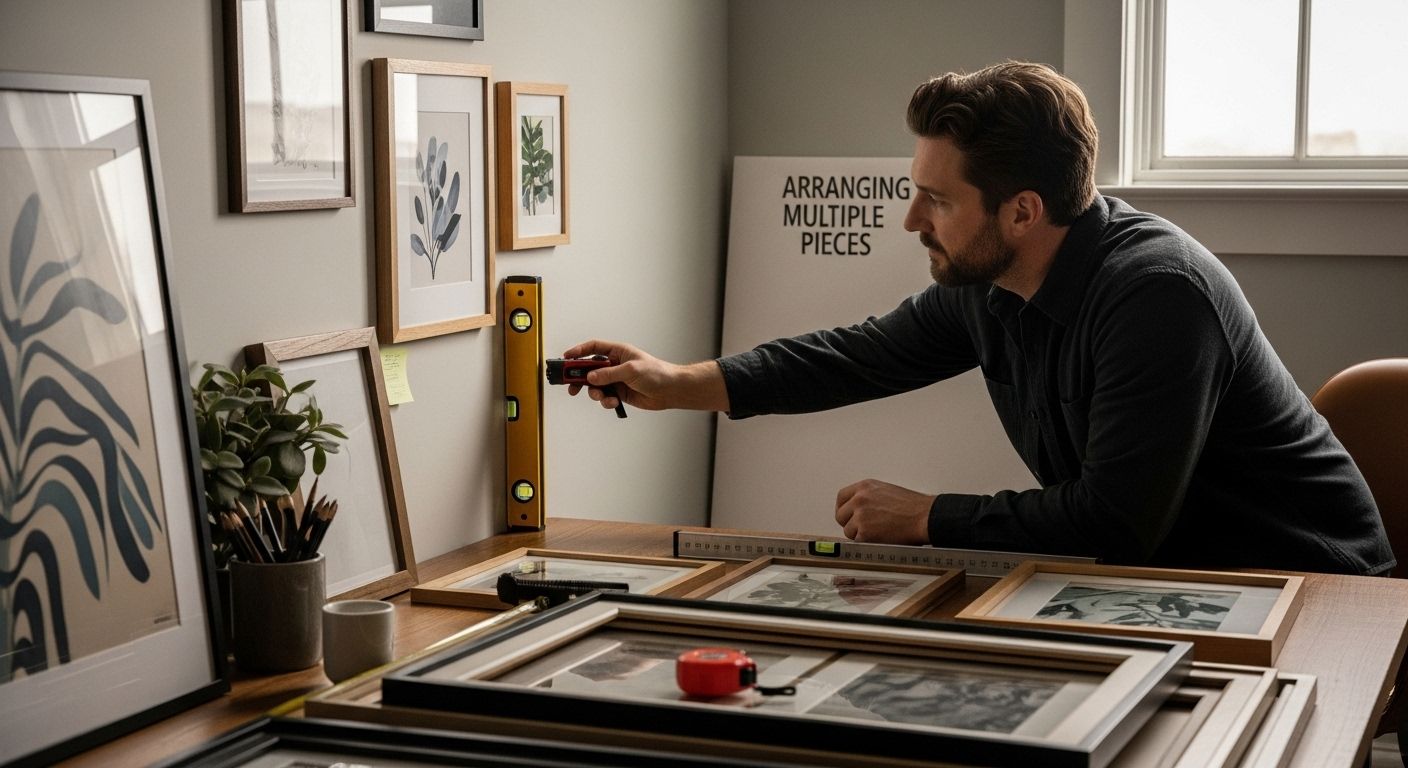
Tips for Arranging Multiple Pieces
Creating a compelling gallery wall or arranging multiple art pieces is an art form in itself. It requires careful consideration of composition, balance, and visual storytelling. Understanding how to harmoniously display multiple artworks can transform an ordinary wall into a captivating focal point that reflects your personal style and aesthetic sensibilities.

Understanding Composition and Symmetry
The Yale National Initiative highlights the importance of understanding symmetry and patterns when arranging art pieces. Just like a mathematical equation, art arrangement follows principles of balance and proportion. Consider creating visual triangles or geometric shapes with your artwork to establish a sense of intentional design.
Start by laying out your pieces on the floor first. This allows you to experiment with different configurations without making permanent wall marks. Group pieces with similar colour palettes, frame styles, or thematic connections to create a cohesive narrative. Aim for a balanced mix of sizes - combine larger statement pieces with smaller complementary works to create visual interest and depth.
Creating Visual Rhythm and Flow
PBS Education suggests treating your wall like a canvas, where each piece contributes to an overall composition. Maintain consistent spacing between artworks - typically 2-3 inches - to create a sense of intentional arrangement. This consistent gap prevents the display from looking cluttered while ensuring each piece has room to breathe.
Consider the visual weight of each piece. Heavier or darker artworks should be balanced with lighter, more delicate pieces. If you’re mixing different art forms - photographs, paintings, prints - distribute them strategically to create a dynamic yet harmonious display. Think of it like composing a musical piece, where each element plays a crucial role in the overall harmony.

Strategic Techniques to Hang Art
The Kennedy Center recommends several strategic approaches to multi-piece art arrangements. One popular method is the ‘anchor piece’ technique, where a larger, more substantial artwork serves as the central focus. Surrounding pieces should complement rather than compete with this anchor.
For symmetrical arrangements, measure and mark precise hanging points. Use a laser level or long spirit level to ensure perfect alignment. If you’re creating an asymmetrical gallery wall, start with your largest piece and build outwards, maintaining an overall sense of balance. Don’t be afraid to leave some negative space - this prevents the arrangement from feeling overwhelming and allows each piece to stand out.
Digital tools can also help. Many smartphone apps now allow you to digitally plan your gallery wall, helping you visualise the arrangement before committing to nail holes. These tools can simulate different layouts, helping you experiment with composition risk-free.
Remember, arranging multiple art pieces is a personal journey. There are no strict rules, only guidelines. Trust your instincts, be willing to experiment, and create a display that tells your unique visual story. Your wall is a canvas, and these art pieces are the brushstrokes that express your personality and aesthetic vision.
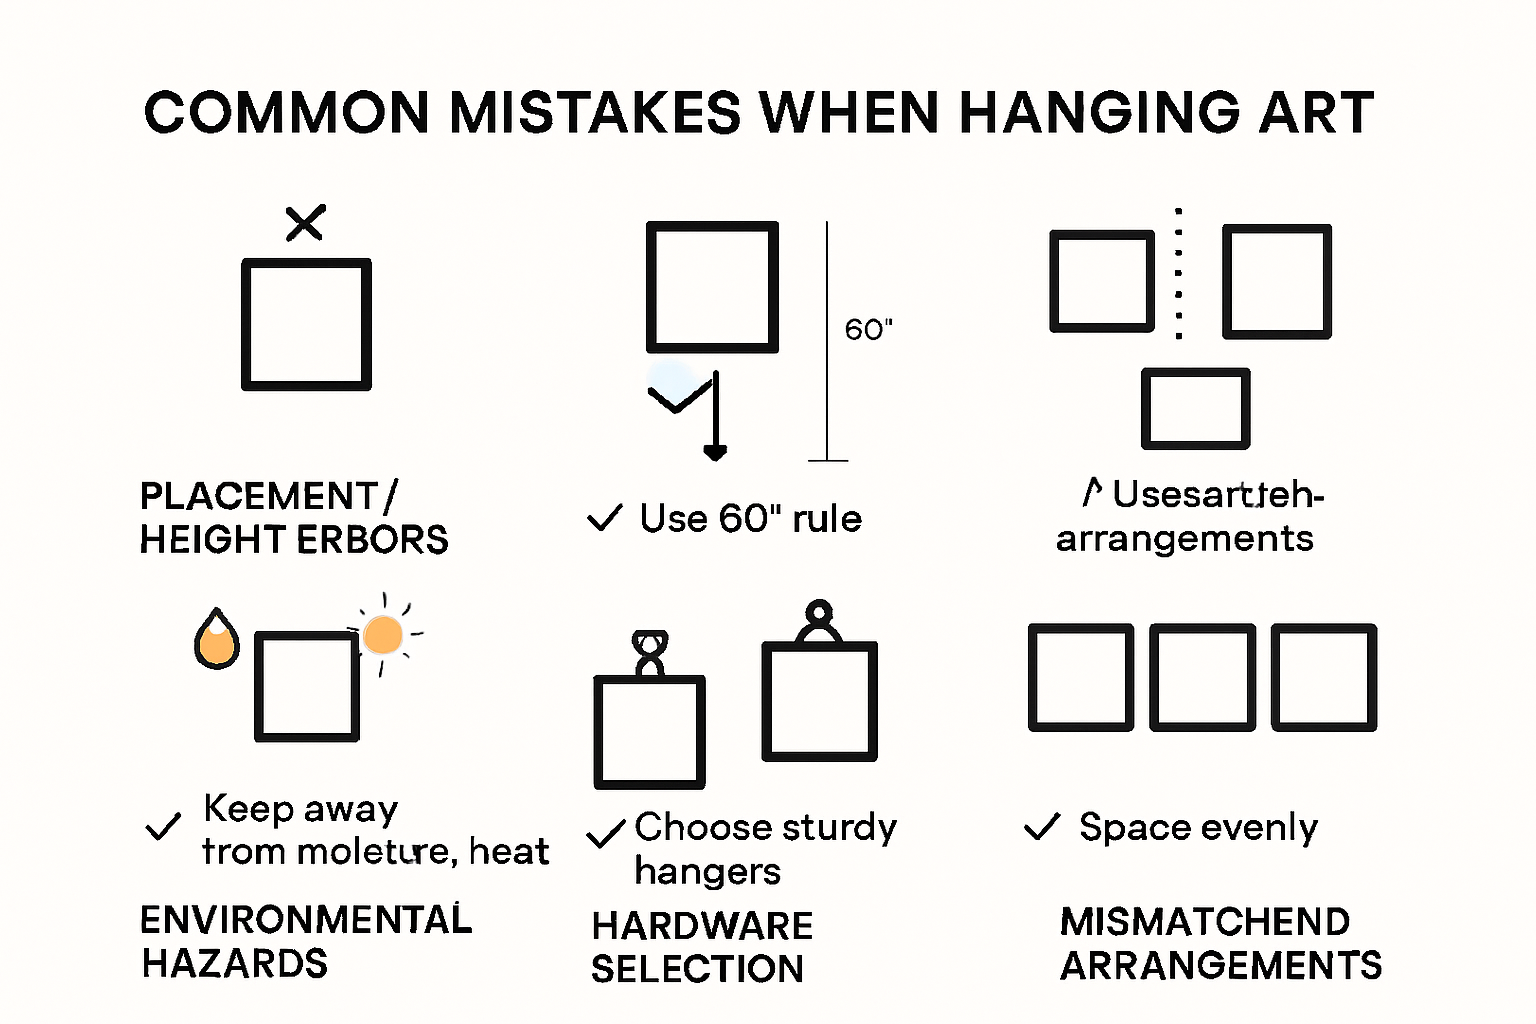
Avoiding Common Mistakes When Hanging Art
Hanging art might seem straightforward, but numerous pitfalls can transform what should be an enjoyable decorating experience into a frustrating endeavour. Understanding and anticipating these common mistakes can save you time, prevent wall damage, and ensure your artwork looks stunning.
How to Hang art? Placement and Positioning Errors
Iowa State University Extension and Outreach provides critical insights into artwork positioning. One of the most frequent mistakes is hanging art at incorrect heights. Many people place artwork too high or too low, disrupting the room’s visual balance. The recommended standard is positioning the centre of the artwork approximately 60 inches from the floor - which corresponds to average human eye level.
Another common error involves neglecting the relationship between artwork and surrounding furniture. Leave 3 to 6 inches of space between the top of furniture and the bottom of the frame. This creates a sense of intentional design and prevents the artwork from appearing disconnected or awkwardly positioned.

Environmental and Preservation Mistakes
The Smithsonian Institution’s Museum Conservation Institute warns against several environmental hazards that can damage artwork. Hanging pieces near heat sources like radiators or fireplaces is a significant mistake. Extreme temperatures and fluctuating humidity can cause materials to expand, contract, and deteriorate prematurely.
Additionally, direct sunlight exposure can fade colours and degrade artwork materials. Choose walls with minimal direct sunlight, or consider using UV-protective glass for valuable pieces. When selecting hanging locations, prioritise walls with stable temperature and humidity levels.
Hardware and Technical Missteps
The Holburne Museum emphasizes the importance of using appropriate hardware and understanding visual weight. Using incorrect or insufficient mounting hardware is a critical error that can lead to artwork falling and potential damage.
Consider these key recommendations:
- Always use wall anchors rated for your artwork’s weight
- Spread mounting points for heavier pieces to distribute weight evenly
- Invest in quality picture hooks and mounting systems
- Test wall strength before hanging valuable or delicate pieces
Mismatching artwork visual weights is another common mistake. Avoid hanging pieces with dramatically different framing styles or visual intensities next to each other. Create visual harmony by grouping artworks with similar characteristics or intentionally creating balanced contrasts.
Before making permanent holes, use painter’s tape to create templates. This allows you to visualise placement, test different arrangements, and prevent unnecessary wall damage. Some contemporary tools like smartphone apps can also help you digitally plan your artwork placement.
Remember, hanging art is both a technical skill and an artistic expression. Take your time, plan carefully, and don’t be afraid to seek professional advice for complex or valuable pieces. Your walls are a canvas, and each artwork tells a part of your personal story.
Pro Tips
Want to dive deeper into styling walls that feel balanced and beautiful? Explore our Content Hub where we share expert tips on art placement and décor styling. You might also enjoy:
More About
For additional expert guidance on proper art installation, see the Smithsonian’s Museum Conservation Institute tips. Their resources explain how to balance beauty with preservation—essential if you want your collection to last.


